Click any item to jump to the details below. Also, you can use CTRL-F to look for a specific topic.
Teaching in D2L
-
General D2L Navigation
-
Grading Student Work
-
Communicating with Students
-
Course Sections
-
Gradebook Setup
-
Standards & Mastery
General D2L Navigation
Let's start by making sure we recognize the main Navigation features in Brightspace.
Grading Student Work
Eventually you'll get some submissions within your Brightspace course. Here's some general directions to get you to the grading areas.
At this point, you're in the grading area and your process for grading from here will depend on the settings for the assignments; rubrics, quick marking, essay marking, file mark-ups, etc...
Communicating with Students
Communicating with students is a key part of remote learning.
Your district or school may have standard ways to communicate with students and/or parents.
Messaging in D2L is email based, meaning that the messages aren't stored within the site. Therefore, you might wish to get good at organizing your emails so you can keep track of communications (eg. folder for each course) .
One excellent tool for communication within Brightspace is the "Intelligent Agents."
Intelligent Agents
Course Sections
The "Section" feature in Brightspace is pretty handy if you have multiple blocks of a course and/or have two (or more) teachers sharing a course. Note: if you're used to using Moodle, you might want to make a "group" but a "group" has a different purpose in Brightspace.
Gradebook Setup
Step 1: Grade Scheme Set-up.
A super-admin can set-up Grade Schemes: Admin > Course Related > Grade Schemes
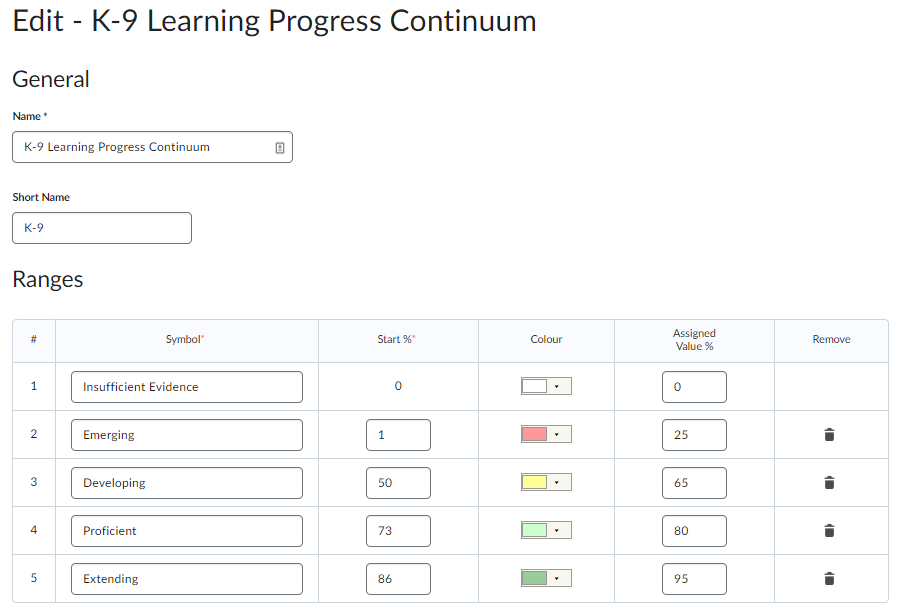
For Grades K-9, the Scheme might look like this:
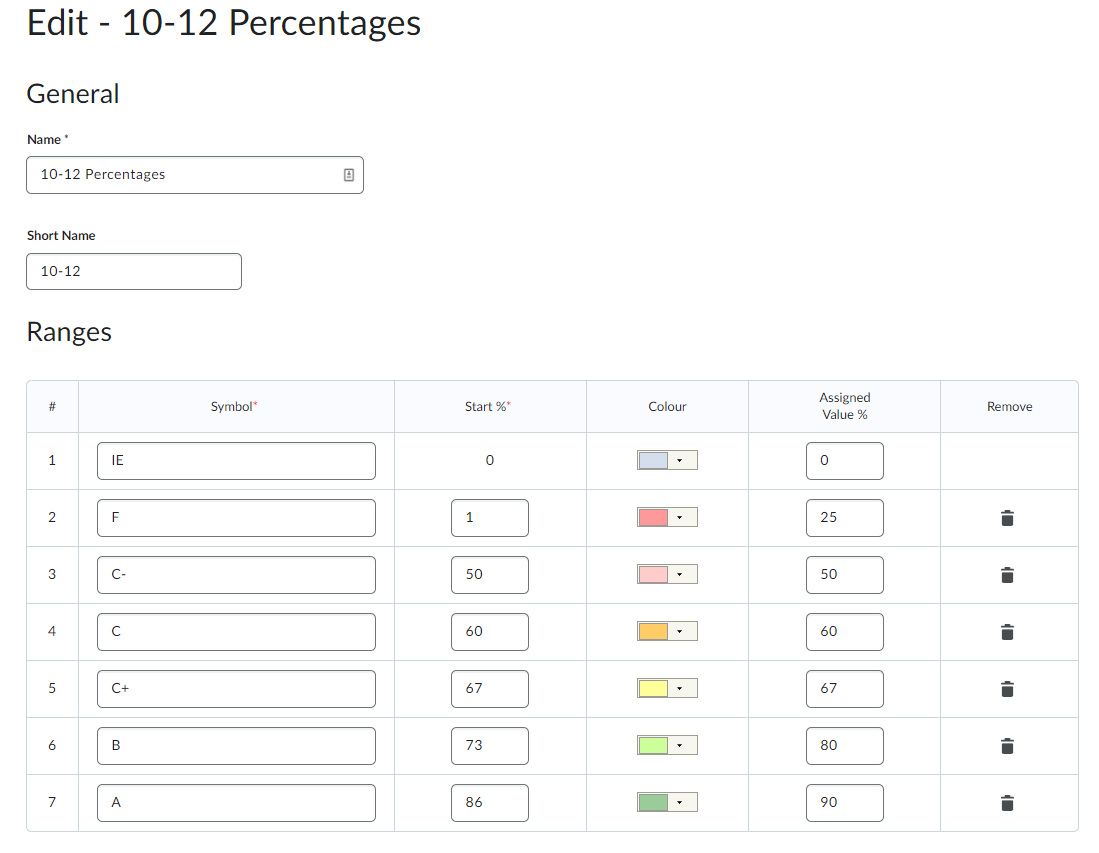
The grade 10-12 Grade Schemes might be less important, as many will use the default (percentage). Given that, if you wish to use letter grades, here are the settings:
Step 2: Assign Grade Schemes (optional - usually for K-9).
Once schemes are developed (Step 1), they can be assigned by teachers (or admin) to individual items, as outlined below:
Within course, go to Assessments > Grades > Manage Grades.
Use the "Select all" (top check-box), then click "Bulk Edit"
Use the drop-down, to select the appropriate scheme.
Save
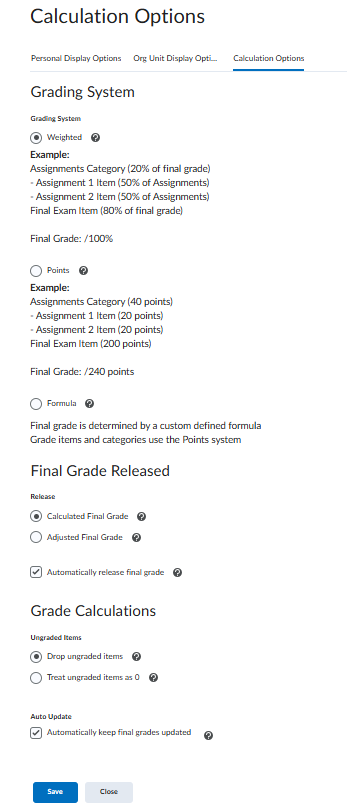
Step 3: Gradebook Set-up.
First part:
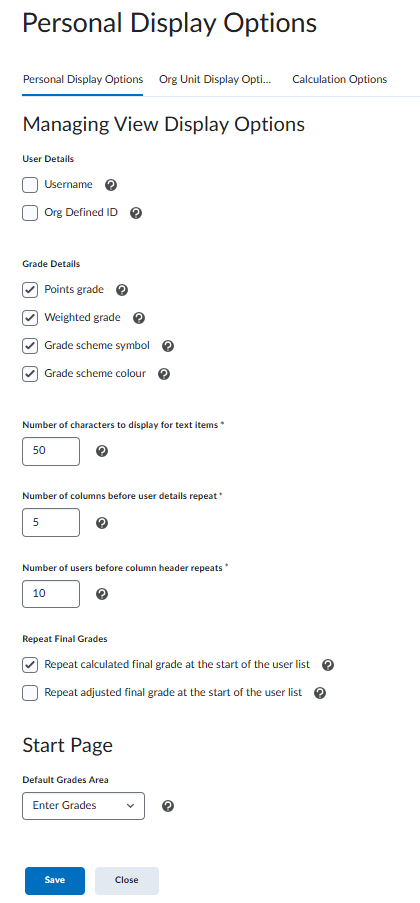
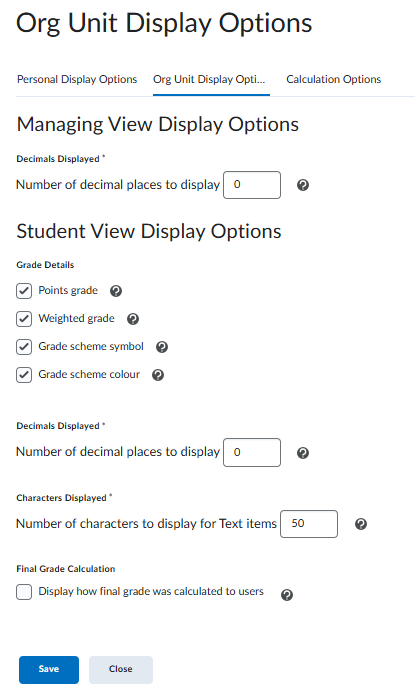
Course Admin > Assessment > Grades > Settings (top-right).
Tab = Personal Display Options. Possible settings:
Tab = Org Unit Display Options. Possible settings:
Tab = Calculation Options. Possible settings:
Step 4: Course Gradebook Viewing.
One last step to ensure that your students can see their current overall grade. Note that this is done ONCE you have students in your course.
Course Admin > Grades......make sure you land on "Enter Grades" (which you should if you did previous steps).
Look in the first column and ensure the eye (highlighted below) is in the Final Grades column.
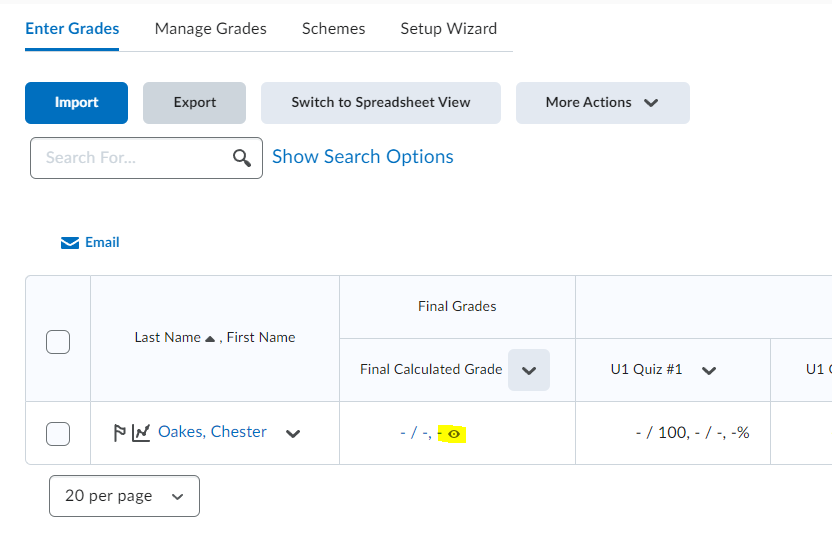
If not, get all of your students on one page, select all, and "release"
Save.
Step 5: Modify Rubrics (option for K-9).
This step will allow existing rubrics to be used, but to not show numerical feedback to students.
Course Admin > Rubrics
For each rubric, use the pull-down to "Edit", scroll to the bottom and expand "Options."
Under "Score Visibility," click "Hide scores from students"
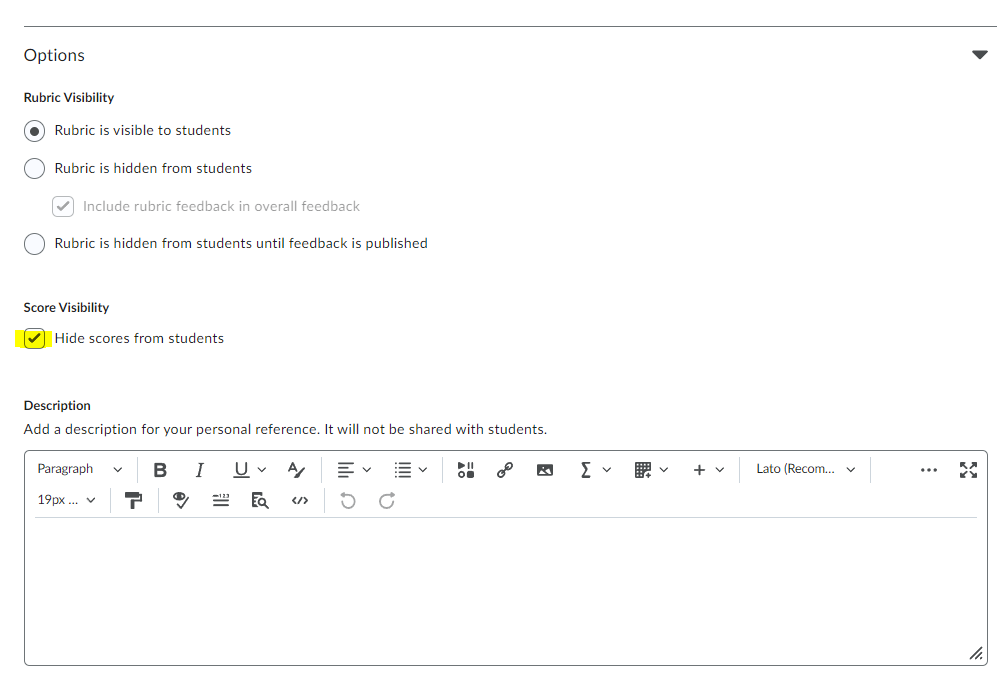
Save.
This will allow students to see the rubric feedback without having a numerical grade attached.
Standards and Mastery
As you probably know, new rubrics and standards were added to Grade 4-9 in all WCLN Math, Science, Socials, English, PE courses within D2L.
Here's a video on how teachers may wish to take advantage of this: