Admin Settings
Before students begin registering the following items should be addressed. These settings can be found in "Admin Settings" in the drop down menu on your profile name in the top right.
1. School District number (e.g. 023) - this will sort the schools from your district at the top of the school list.
2. Report Card Header - this can include school name and is one line only
3. Report Card footer - you can include school name, address, phone number, website, etc.; one line only
4. Registration email - this is the email a student receives upon submission of the registration form. It may include information about necessary documents and further instructions to the student.
Sample email: Thank you for registering for a course with the Online School. You will be contacted shortly with further information. If you are not a student in this district you will have to provide information before you can start the course. This will include BC Identification, Birth Certificate and Care Card.
5. Verification email - After the student information is verified, the student receives an email with their username and password; additional information can be added here, e.g. link to access the site.
Sample email: Below you will find your user name and password to access the course you recently registered for. Please go to http://mymoodlewebsite.com and log in. Under the link "My Courses" you should find the link to your course. Please begin the course as soon as possible as you are not formally registered in the course until you have completed the first few assignments. Please email or call if you have any questions or concerns.
6. Confirmation statements - These statements will appear at the end of the registration process, before the student submits the registration form. You may include as many as necessary.
Sample confirmation statement: I understand that this application and agreement represents a legal digital signature on my behalf for registration in this online course. I agree to communicate with my teacher(s) regularly and complete all course work in a timely manner, keeping track of all deadlines.
Staff
The link for staff is at the top left of the page. Add staff members and assign a role (teacher, admin, clerical, counselor) and a school.
-
- Teachers - Teachers are restricted to viewing students in their courses in LMS
- Admin - Admin can see everyone and do everything (including system set-up).
- Clerical - Same as admin, but can't adjust system settings (eg. make staff, set-up options, etc....)
- Counselors - Counselors are restricted to their students enrolled in their schools.
Note that the email address for teachers will link to their LMS email address so they should be the same.
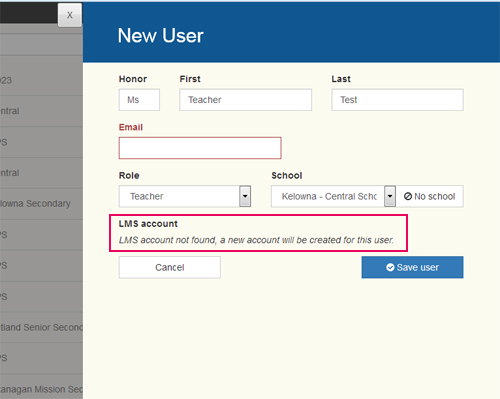
Once you select the role of TEACHER in the SMS, the account should sync to their LMS account, or you should receive the message as shown below.
If you add a teacher who has an account in the LMS, the SMS will send an email to that user with their username and password.
If the teacher is not already in the system an account will be created and the login information emailed.

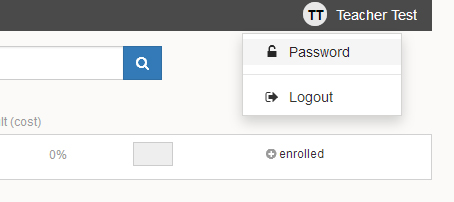
Users should be encouraged to change their password by going to the top right profile area.

Courses
Moodle courses need to be designated as open, closed or hidden.
open - courses are displayed on the list of courses that students may select from
closed - courses are not displayed on the list of courses (for registration) but are available through the SMS
hidden - courses are hidden in LMS and are not tracked by the SMS
A program needs to be applied to each course, e.g. DL - elementary, graduated adults, etc.
